
It’s easy to get overwhelmed by the number of maintenance variables that ensure the reliability and longevity of your vehicle. Fortunately, technological advances and engineering have stretched the service intervals of many wearable items. This in turn reduces the frequency of maintenance to reduce consumption and cost while simplifying the responsibilities of vehicle ownership. However, there are some basics that everyone should be conscientious of, mainly pertaining to your tires and your engine. These are simple but important default vehicle settings and practices applicable to any street vehicle.
Text and Photos by Richard Fong
DSPORT Issue #172
Mechanical Traction
Tire manufacturers have invested heavily into tire development to achieve optimal handling, traction, wear and durability while keeping cost within reason to the consumer. Tire technology has risen to the point that, in an emergency, some tires can run without any air pressure at all. However, these “run-flat” tires are expensive and are not to be driven on for more than approximately 50 miles without air. For all vehicles on the road, including those with run-flat technology, maintaining proper inflation of the tires ensures optimal traction (whatever weather conditions the tires are designed for), wear and efficiency.
Riding on Air
When you look at the sidewall of a tire, there is a myriad of data to comprehend. When it comes to inflation, it’s good to know the maximum tire pressure recommended by the manufacturer. However, it’s recommended to follow the guidelines of the vehicle manufacturer as well. Since the early 2000s, manufacturers standardized the placement of decals in the driver door jamb with the suggested cold inflation pressures for stock replacement tires. Some older vehicle models already have these decals. If yours does not, refer to the owner’s manual. So, why cold inflation pressure? Tire pressures should be measured when cold (when the car has been sitting for at least a few hours) to ensure consistent tire pressure measurement. As you drive, the tires heat up, causing the air inside the tires to also heat and subsequently, expand. This will raise the measured tire pressure compared to cold, depending on how hot the tires get.

Inflating to “Just Right”
With exception of racing conditions, where tire inflations are adjusted to improve traction for the track conditions, proper tire pressures deliver the best balance of tire performance to the streetcar driver. The factory recommended tire pressures ensure optimal fuel efficiency, wet and dry traction, braking performance and tire wear. Over-inflated tires might deliver marginally improved mileage and steering response, but will likely lead to irregular wear and overall handling. Underinflated tires could offer improved traction but could result in heavier steering, reduced mileage and accelerated treadwear. Either condition could also put the tire at greater risk of a blowout.
Rotation Station
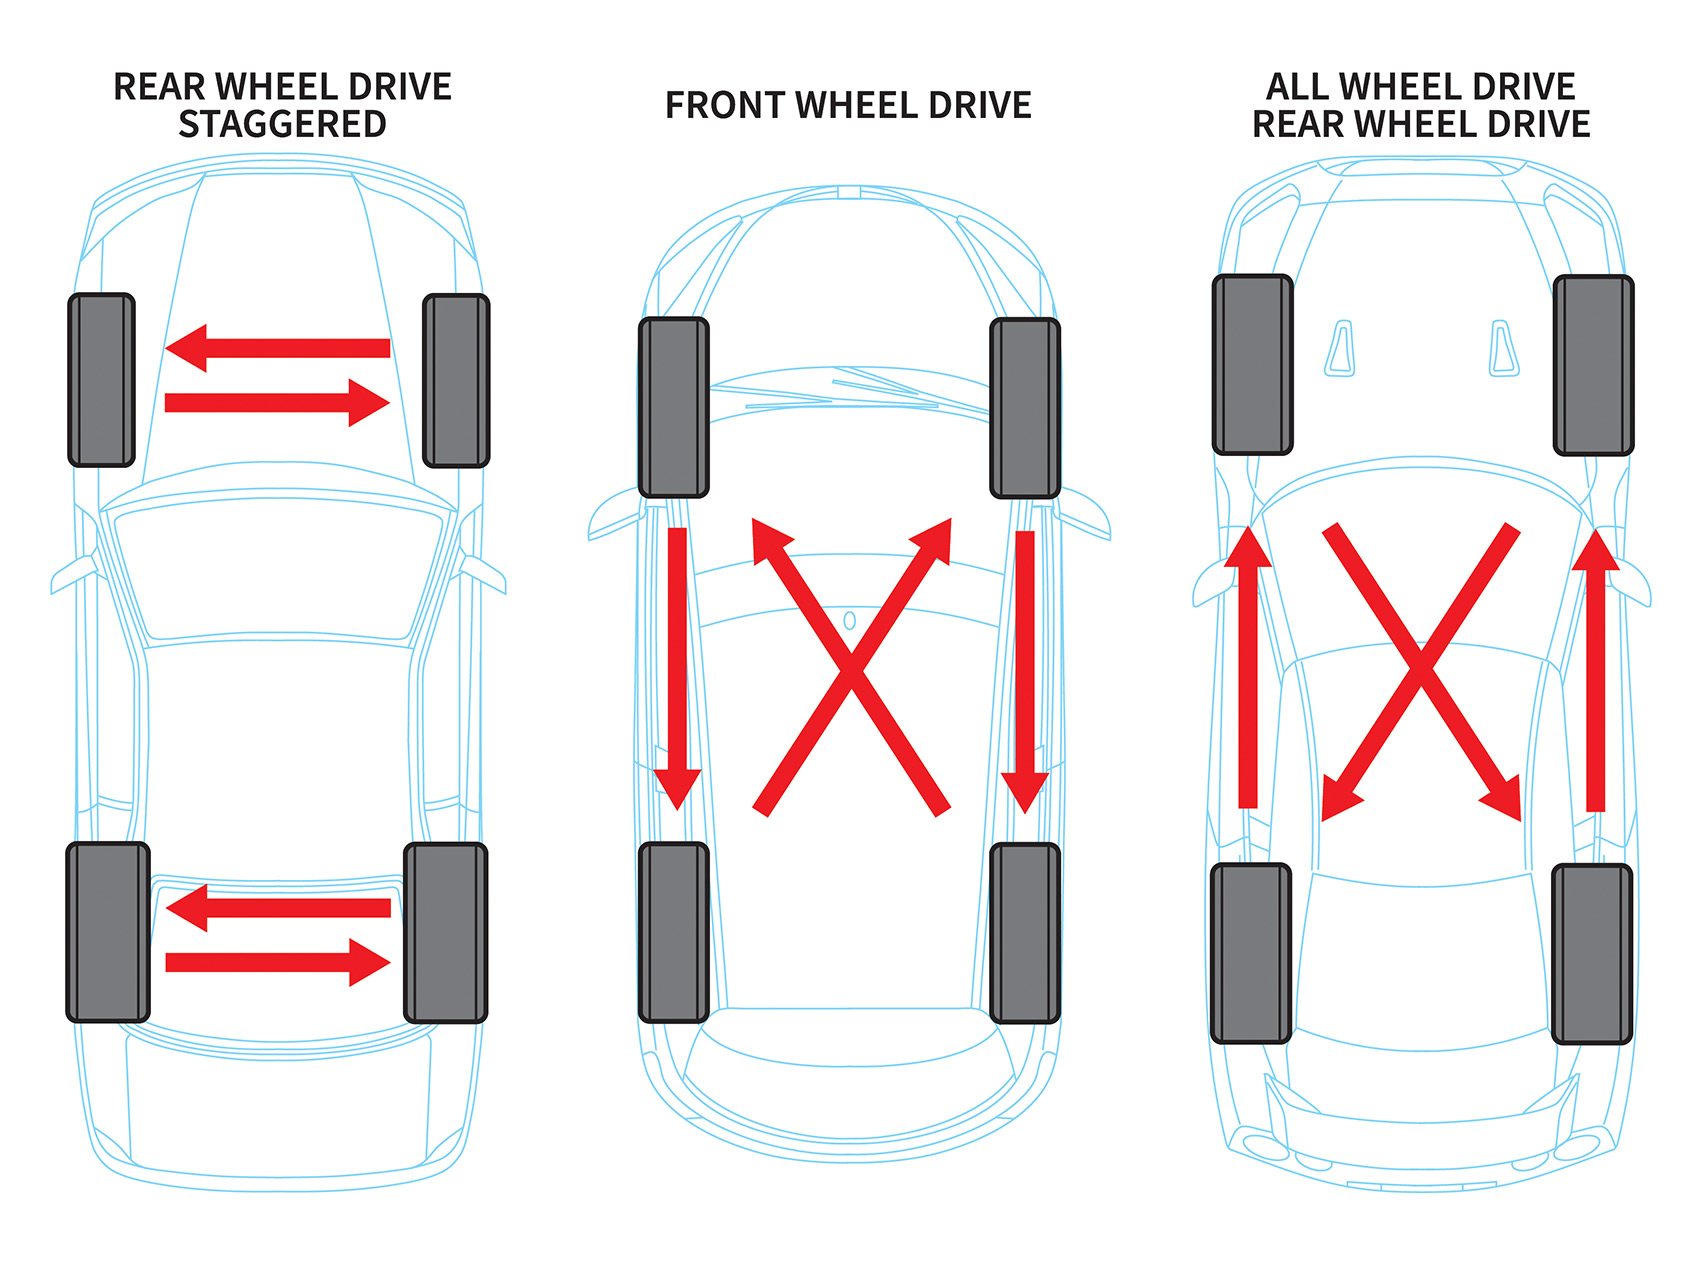
Which rotation method works best for your ride depends on the driveline layout and tire type (Directional vs. Nondirectional). It doesn’t hurt to rotate the tires often, but it should be done at least every 6,000 miles or every other oil change.
Even Out the Wear
Although all four tires carry a share of the vehicle’s weight, each might perform additional duties which could lead to inherent and irregular wear. The front tires of all cars must perform the duty of steering, which can accelerate wear to the shoulders of the tread. To even out the wear on the tires, periodic tire rotations will ensure that the tires deliver optimal service life. Although each vehicle and tire manufacturer has its own recommendations for tire rotation intervals, ranging anywhere from every 3,000 miles to every 10,000 miles. A good rule of thumb is to rotate them every other oil change (roughly 6,000 miles or 6 months). However, the type of tire, wheel/tire configuration and the vehicle driveline will dictate which method of tire rotation will best suit your application.
Assuming that you’re rolling on a “square” tire arrangement, where all four tires and wheels are the same size, you can rotate the tires using one of two typical rotation patterns, depending on your driveline configuration. In the case of a front-wheel drive vehicle, the front tires stay on the same side and move to the rear positions, while the rear tires move forward and swap from left to right. In the case of rear-wheel drive and all-wheel drive, the rear tires stay on the same side and move to the front, while the front tires move to the rear and swap from left to right.
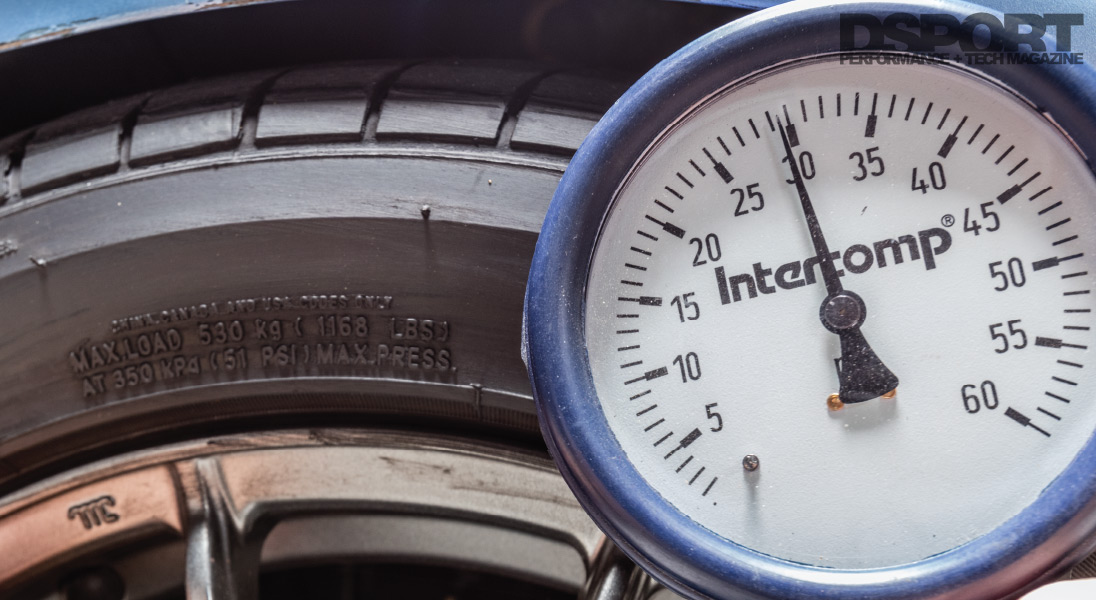
While the maximum cold tire pressure in this case is 51psi, the manufacturer recommended inflation happens to be around 32psi. At the track, we aim for a cold inflation of around 29psi, and then make adjustments to optimize handling.
Which Way to Roll
Unidirectional or asymmetrical tires are designed to roll in a specific direction for maximum traction (both wet and dry). These varieties typically have a notation on the sidewall of the tires with an arrow indicating the direction of rotation. This is especially important since the tread design of most tires optimize water channeling out of the contact patch for wet traction. In the case of non-directional tires, the tires are designed to function or to roll in either direction. Some tires can have markings on the sidewall stating “Inside” and “Outside”, which defines a specific inner and outer tread. If there are no markings at all, the tires can roll either direction and do not have specific inner and outer treads.
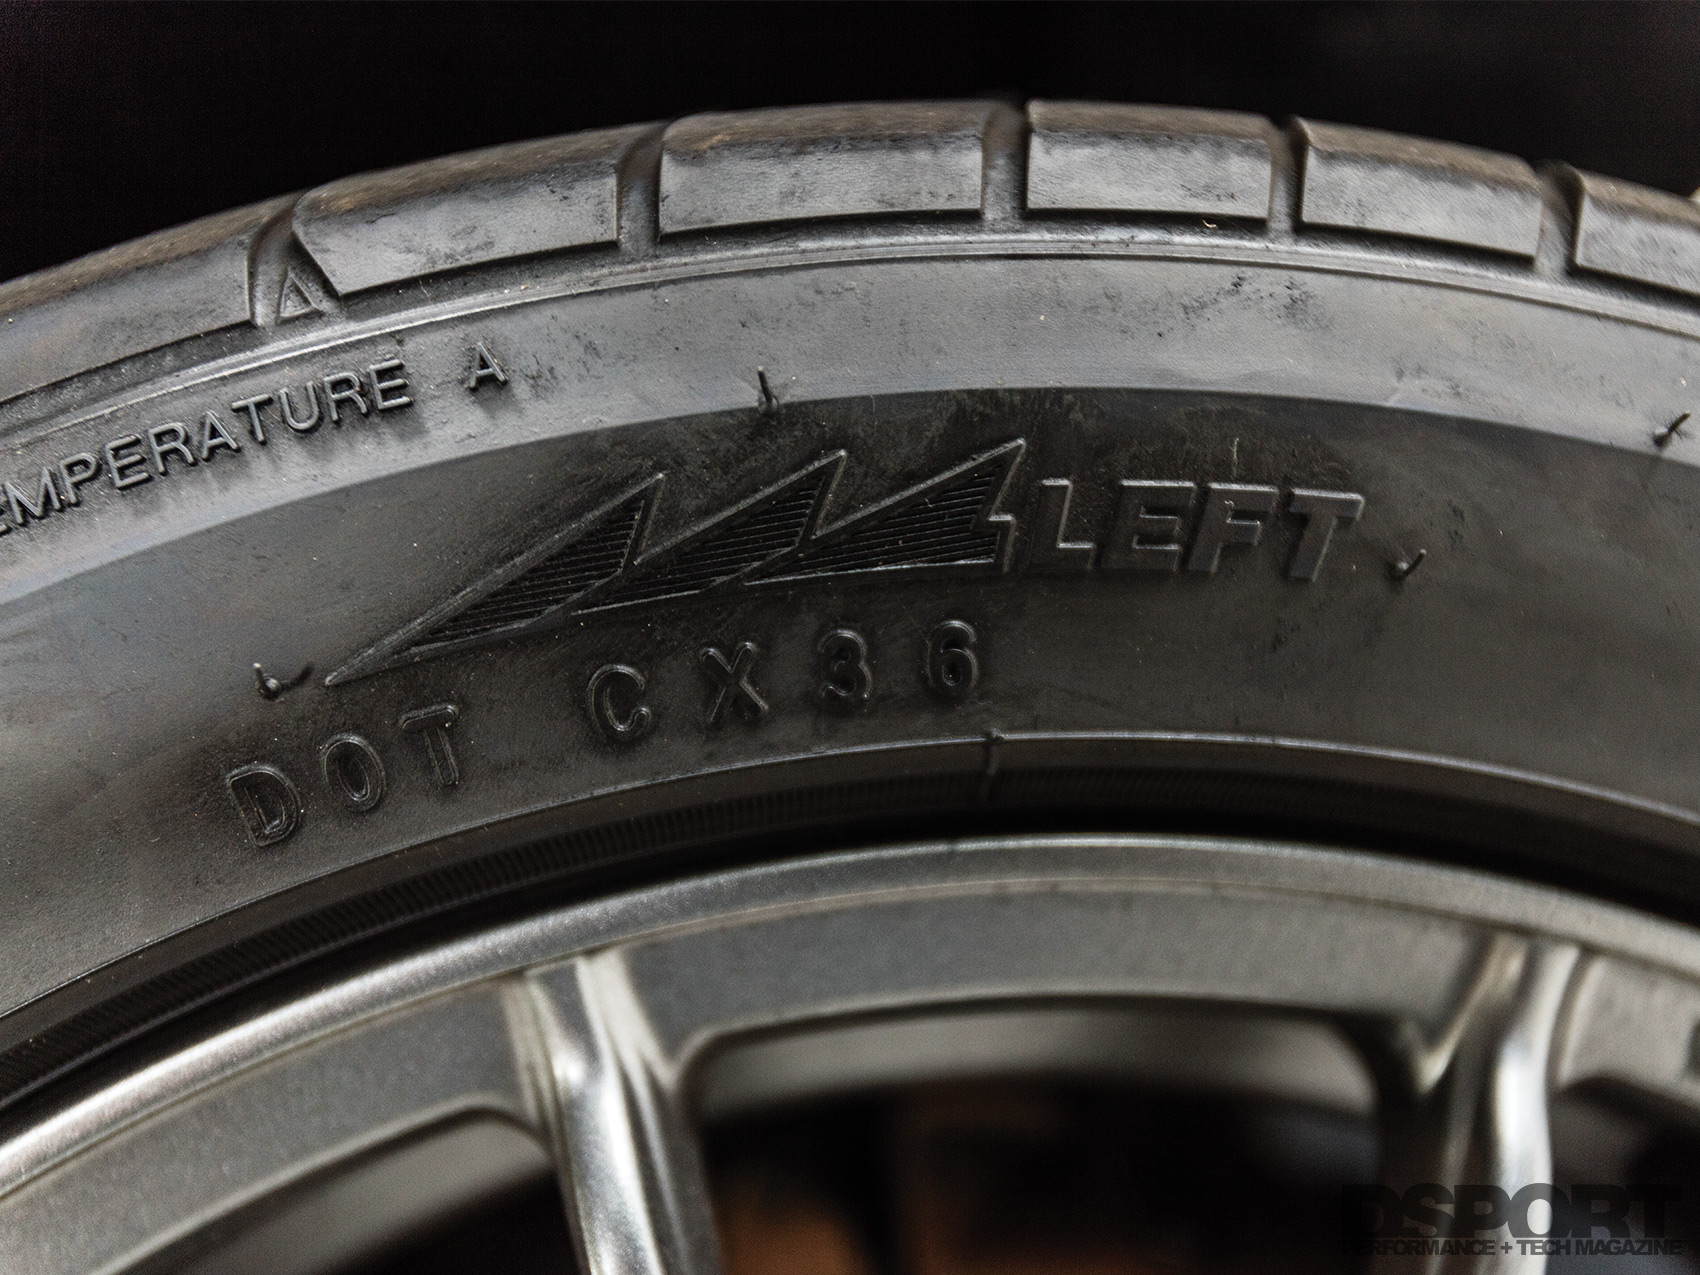

Directional Tire
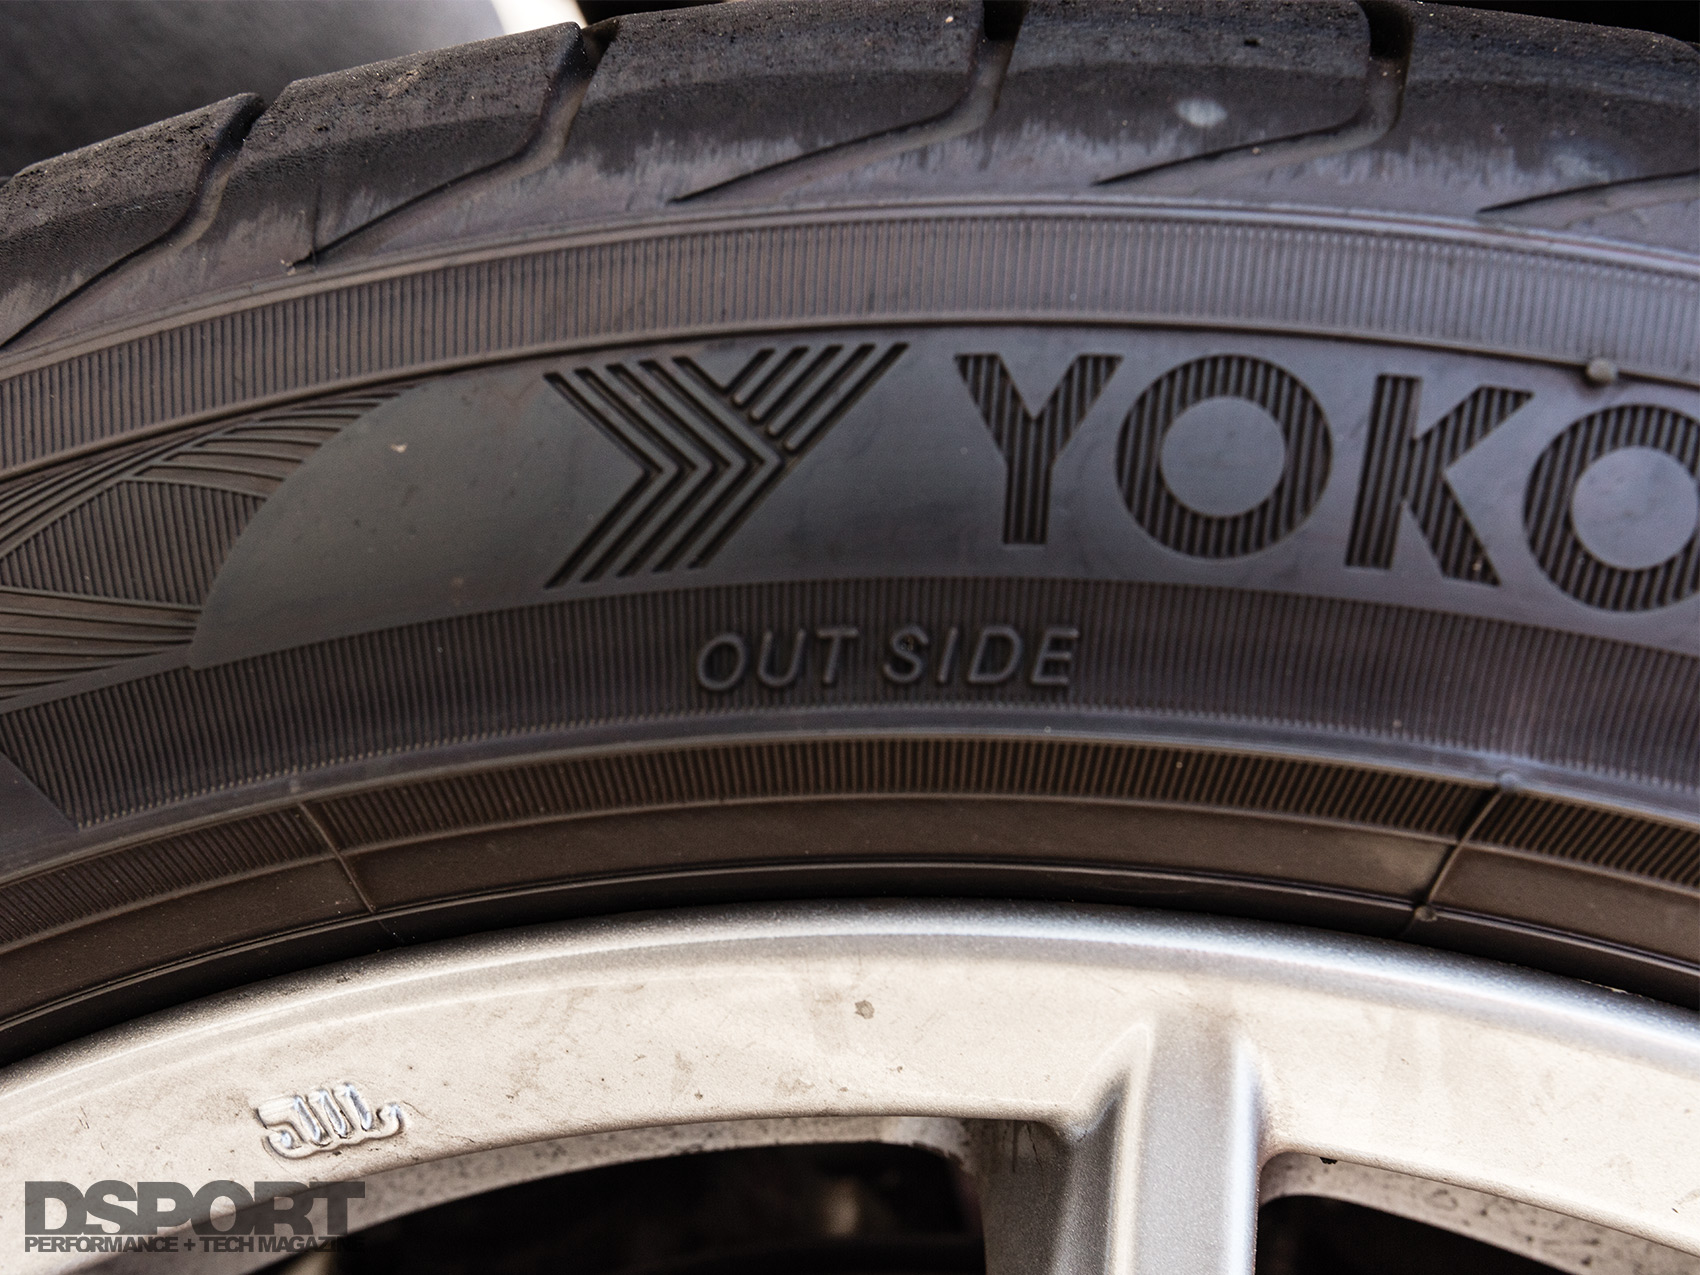
Non-Directional Tire
Special Cases
If you’re running a staggered wheel fitment (commonly on some rear-wheel drive platforms) then rotating the tires from left to right is an acceptable rotation pattern. In all circumstances, be wary of unidirectional/asymmetrical tires. While the rotation pattern indicates where the tires should be positioned, the direction of tire rotation is still imperative. It may be necessary to have the tires remounted on the wheels in order to ensure proper rotational direction for a given tire rotation pattern.
Right on Time
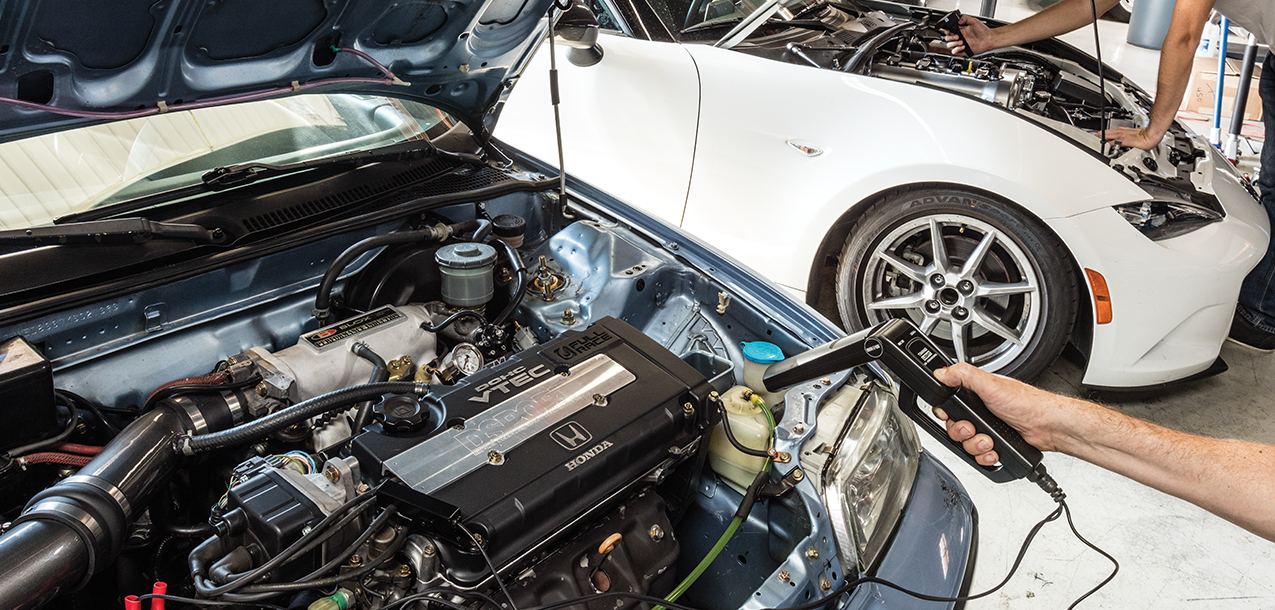
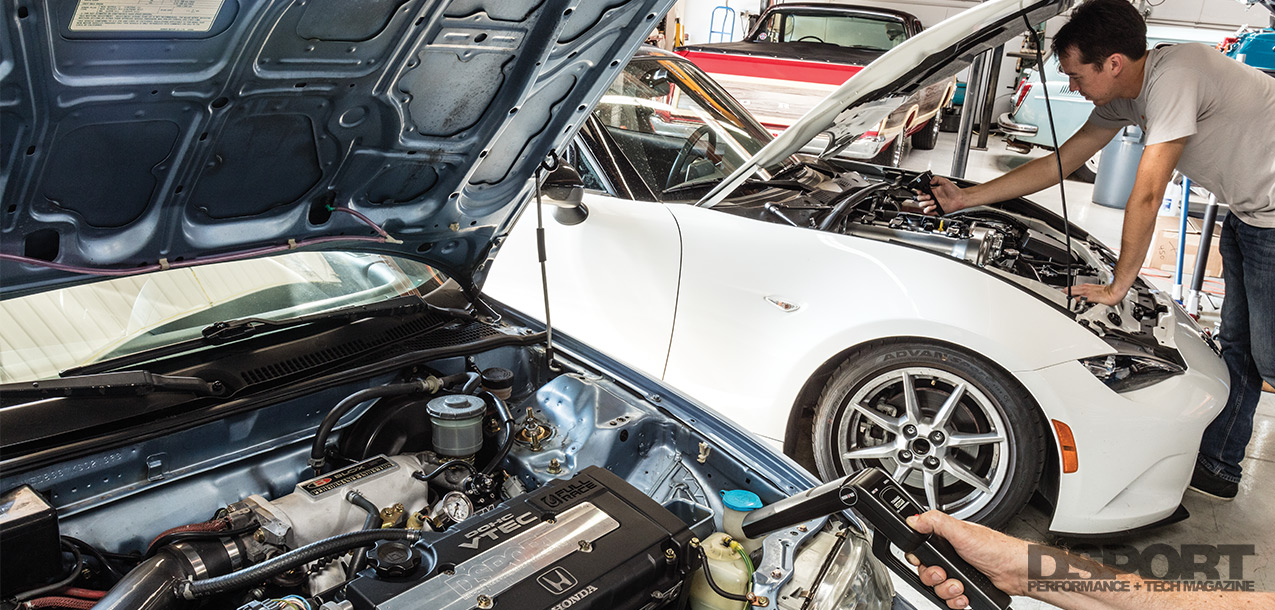
Another factory setting that can affect your vehicle’s operation and efficiency involves ignition timing. If you pump fuel into your car, it’s got a combustion engine. In order for combustion to occur, it requires a spark delivered at the moment that the piston finishes compressing the air/fuel mixture in the combustion chamber. Engines still employ mechanical timing mechanisms to set or adjust the initial timing of the ignition. On vehicles with a distributor, the timing could be adjusted by rotating the distributor on its axis. In the case of distributor-less ignition systems, the engine management system (EMS) can drive the individual coils, but it still relies on a mechanical timing device to ensure that the EMS knows the precise crankshaft and rotating assembly position. This device is often driven by a camshaft and is referred to as a cam angle sensor. In either case, proper ignition timing will ensure optimal performance and efficiency from the engine. If the ignition timing is too far advanced, the spark plugs are firing sooner which could result in marginal gains at lower engine speeds. Unfortunately, advancing the initial timing could put the engine at risk of pre-ignition and subsequent knock or detonation. By contrast, if the ignition timing is too far retarded from the factory recommended settings, the spark plugs are firing later and the engine could suffer from incomplete combustion, reduced output and poor fuel economy. In the case of carbureted vehicles, the initial timing was critical as it typically did not change throughout the engine’s RPM range. By contrast, many of today’s fuel injected engines rely on a sophisticated engine management system (EMS) to optimize the ignition timing at any engine speed. However, the initial timing needs to be adjusted properly to ensure that the EMS ignition maps are proportionally correct. If the ignition is advanced one degree, the entire EMS ignition table will be advanced by one degree.
Using a timing light, set the initial timing by turning the distributor or cam angle sensor until the pointer lines up with the red timing marker on the crank pulley. This example relates to a Honda B17 engine. Settings will vary by engine.
Resting RPM
Another simple adjustment for optimal engine operation is the engine’s idle speed. Most engines will run at a slightly higher engine speed (around 1,500 RPM) to facilitate engine warmup when the engine is cold. Once the operating temperature is reached, the engine idle speed should drop down to somewhere between 650 and 1,000 RPM (depending on the manufacturer’s specifications for a given engine). Running an engine at too high of an idle wastes fuel, could lead to overheating when sitting in traffic and could cause accelerated wear on the rod bearings. If the idle is too low, the engine could become prone to stalling and vibrations (either on its own or by a driver not acclimated to feathering the throttle to break from a stop). Idle can be adjusted by several methods depending on the manufacturer. Some engines feature a throttle body with an idle adjustment screw and an Idle Air Control valve (IAC). The latest engines with drive-by-wire throttle bodies can adjust the idle electronically by way of the engine management system.
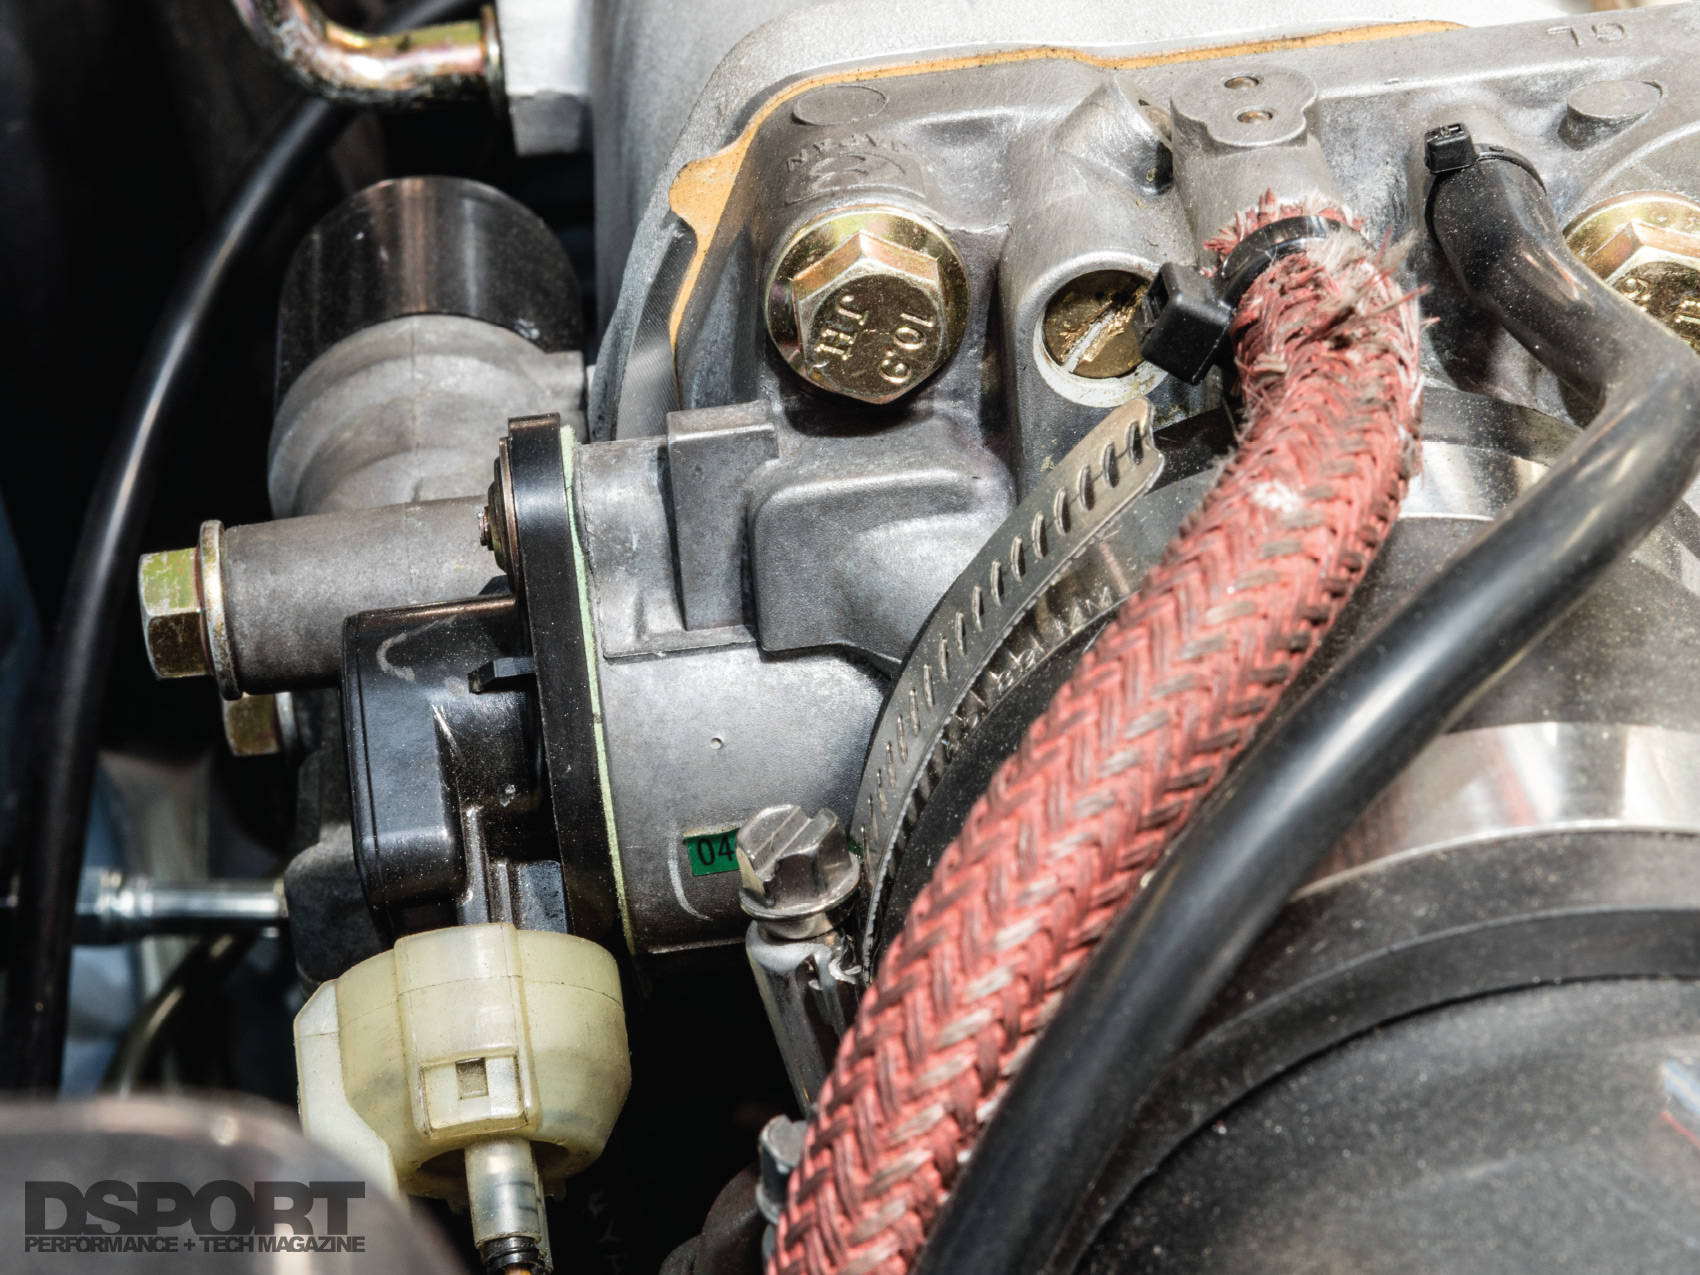
Some engines rely on an idle adjustment screw to adjust the idle. An idle air control valve helps the engine adjust idle speeds as needed (cold starts and turning on the A/C).
Get Set, then Go!
Whether you’re about to go on a trip or are about to start your work week, it’s a good practice to be conscientious of these basic settings and where your vehicle stands. If anything is not within the manufacturers’ specifications, adjusting them will ensure that your car will continue to function reliably for you. With everything set properly, you’ll be ready to hit the road.

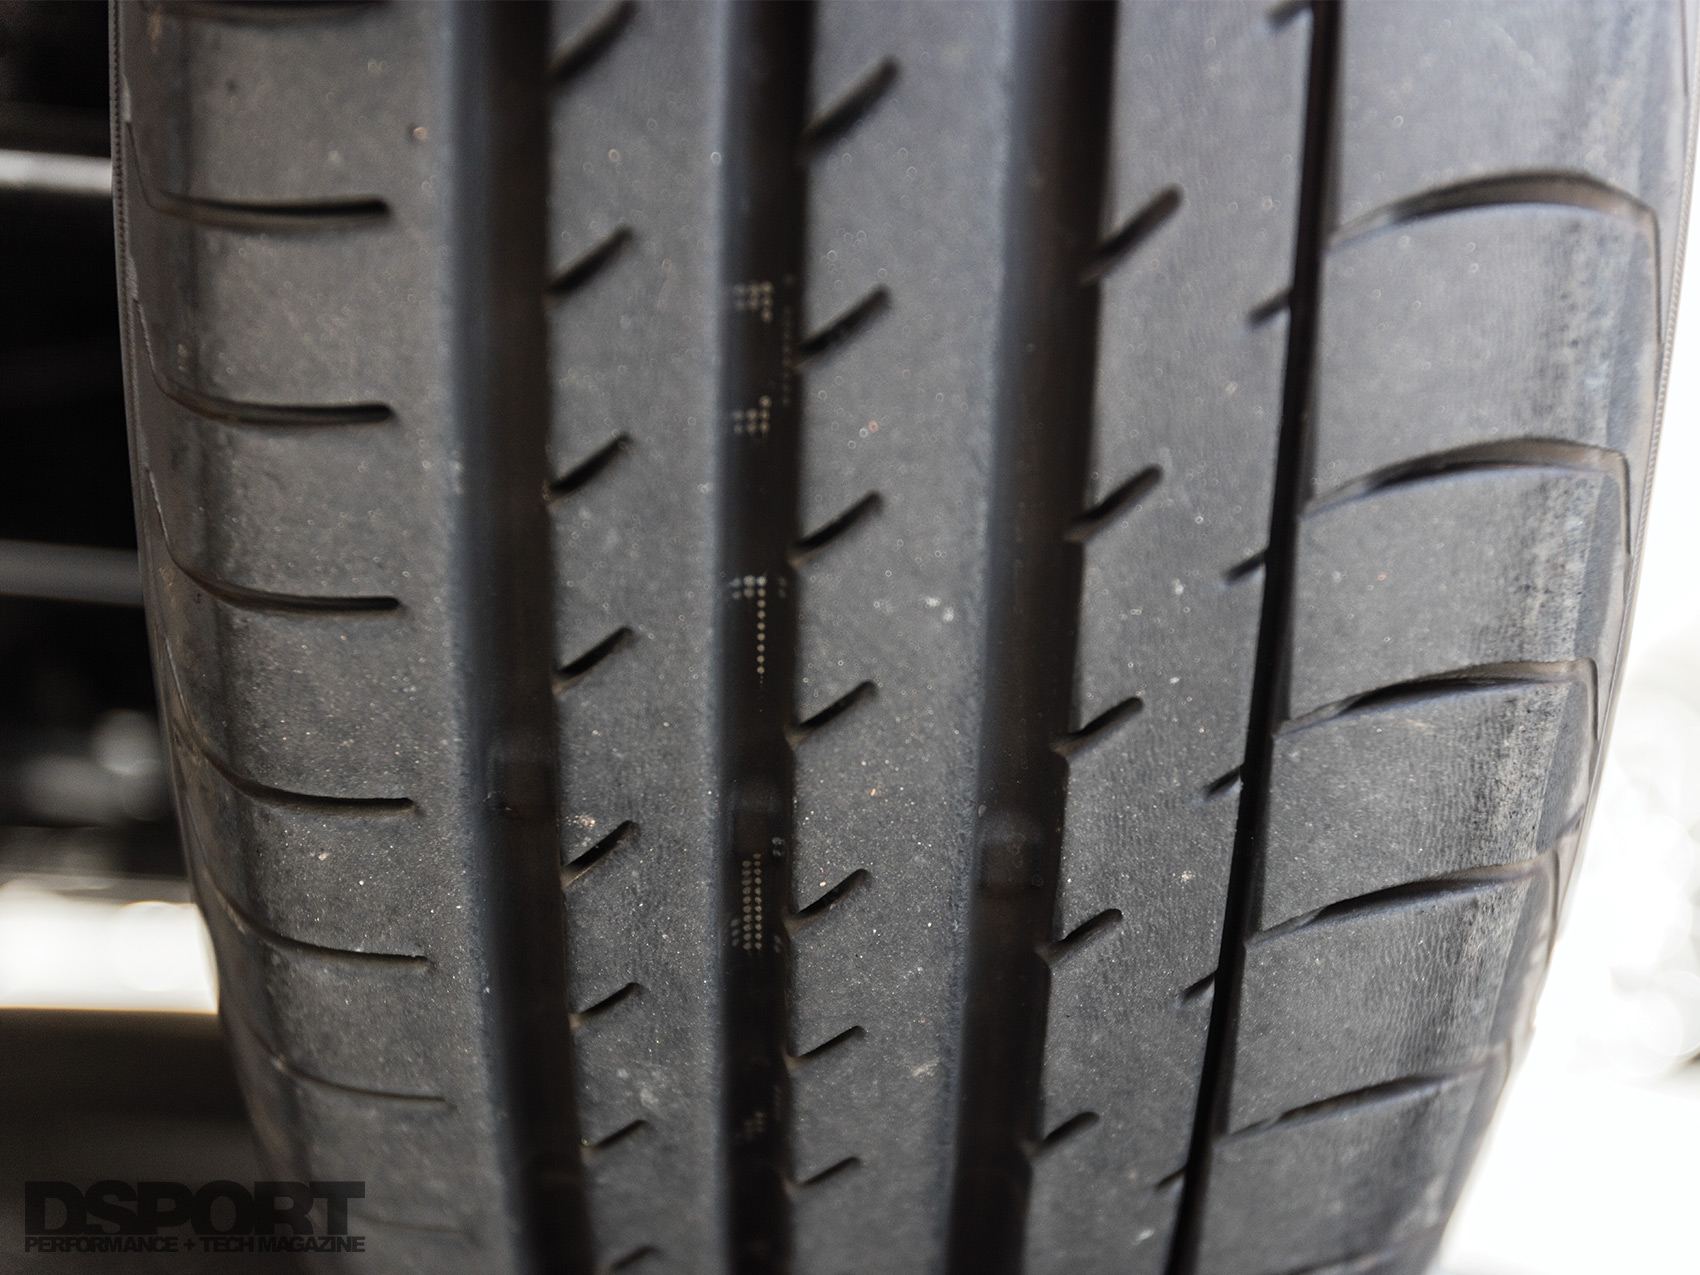
Properly inflating tires optimized for wet conditions ensures that water is channeled out from the tire tread for optimal handling and braking.
